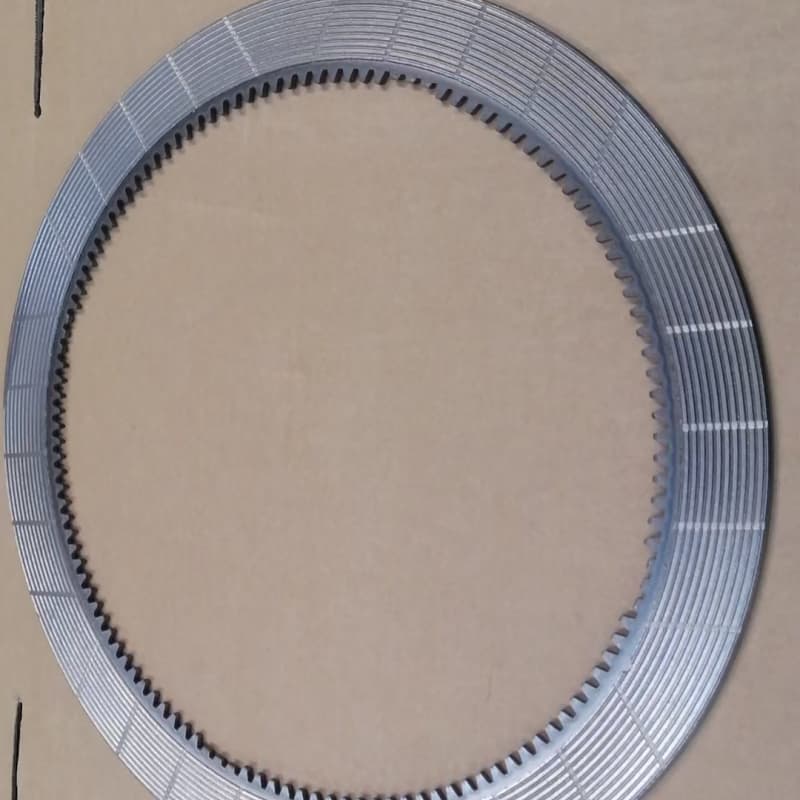
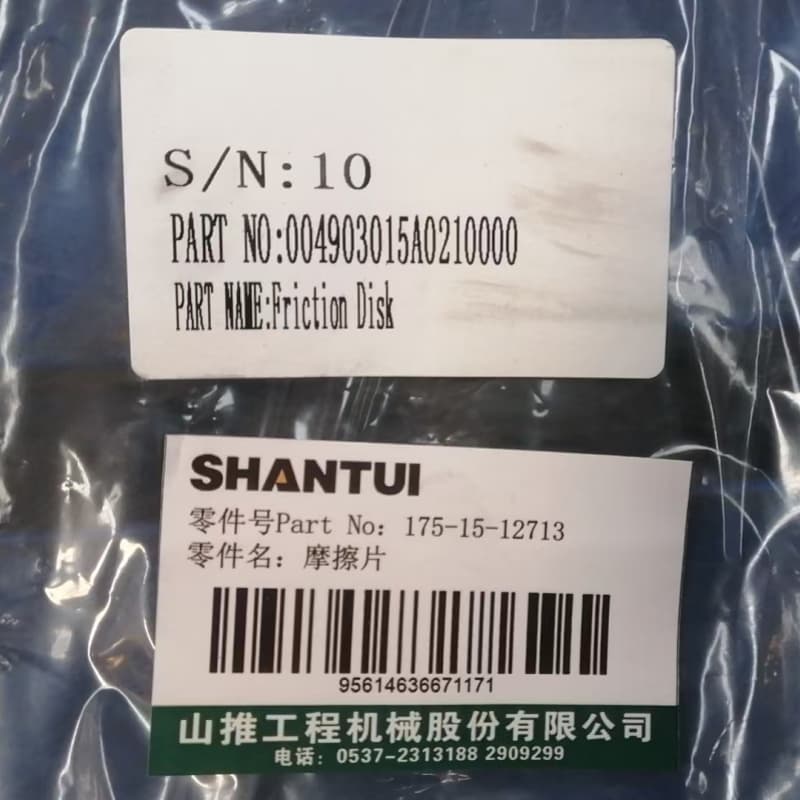
SHANTUI 175-15-12713 Bulldozer Gearbox Friction Plate
1. Excellent friction: Adopting high-performance friction material with stable friction coefficient, which can ensure strong friction and efficient power transmission.
2. Durability: After special processing, it achieves high surface hardness, strong wear resistance and ablation resistance, it can withstand frequent clutch operations and has a long service life.
3. Precise adaptation: designed for various types of bulldozers, accurate size, easy to install, high adaptability, ensure a tight fit after installation.
Representationproduct pressure
Basic information
Model: Shantui SD22 gearbox friction disc model usually has a specific code (depending on the production batch and submodel of the manufacturer).
Purpose: As a component of the gear shift mechanism, it interacts with the steel discs to achieve power transmission and disengagement, and complete the gear shift of the transmission.
Product structure
Friction material layer: To ensure a high and stable friction coefficient, specially developed friction materials, such as copper and paper, are used.
Steel Backing: Made of high strength steel, it provides support for the friction material and overall strength of the friction disc.
Technical Parameters
Friction coefficient: usually 0.3 - 0.5 for efficient torque transmission.
Thickness: Typically 2-4mm, may vary slightly from batch to batch.
Operating temperature range: - 40℃ - 250℃.
Production process
Material Compounding: The friction material is tightly bonded to the steel substrate through hot pressing and other processes to ensure bond strength.
Surface treatment: The surface of the friction disc is ground and polished to ensure a tight fit with the steel disc and a uniform contact area.
Detailed steps for installing the bulldozer friction plate
1. Preparation before installation
1. Tool preparation
Wrenches: Prepare various sizes of open-end, socket, and box wrenches for removing and installing various bolts and nuts. For example, removing the clutch pressure plate bolts may require a 17-19mm socket wrench.
Screwdriver: Equipped with a Phillips screwdriver and a flat-head screwdriver, it is used to loosen and tighten some small screws, such as the screws that secure the dust cover or sensor.
Snap Ring Pliers: There are internal and external snap ring pliers, which are used to remove and install snap rings. Snap rings are often used to secure the position of friction plates on splined shafts.
Torque wrench: This is a key tool used to precisely control bolt tightening torque to ensure secure, standard installation. Clutch and brake bolt tightening torques vary among bulldozer models, and they must be operated strictly in accordance with the equipment's operating manual.
Special Tools: Depending on the bulldozer model and design, some special tools may be required, such as special tools for removing and installing the clutch pressure plate, which can ensure that the pressure plate is evenly loaded during removal and installation to avoid damage.
(II) Checking accessories and equipment
Friction plate inspection: Carefully check that the new friction plate model and specifications fully match the bulldozer. For example, the Shantui SD16 bulldozer requires specific friction disc models and sizes, which cannot be mixed. Inspect the friction plate's appearance to ensure there are no defects, such as cracks, delamination, bulges, etc., on the friction material surface, and that the steel base is not deformed or rusted.
Checking the relevant accessories: Check the completeness and quality of the relevant bolts, nuts, springs, retaining rings, and other accessories. Bolts and nuts should not be stripped or deformed, springs should not be broken or worn, and retaining rings should have good elasticity.
Preparing the lifting equipment: Select suitable lifting equipment, such as a hydraulic jack or lift. The hydraulic jack must have sufficient lifting capacity to safely lift the relevant parts of the bulldozer and ensure ease of operation. Before using the lifting equipment, test its functionality to ensure safety and reliability.
3. Site planning and safety measures
Selecting a location: Choose a level, dry, well-ventilated, and well-lit area, such as a maintenance shop or dedicated work area. Ensure the surrounding area is clear of obstructions, leave sufficient work space, and stay away from ignition sources and flammable materials.
Safety precautions: Operators must wear personal protective equipment, such as hard hats, protective gloves, and safety shoes. A hard hat can protect the head from accidental impacts, protective gloves can protect the hands from scratches and burns, and safety shoes can prevent impacts to the feet from heavy objects.
(IV) Preparation for removal of the old friction plate
Turn off the equipment and disconnect the power: Park the bulldozer in a safe location, engage the parking brake, and ensure the vehicle is stationary. Turn off the engine and disconnect the negative battery terminal to prevent accidental starting or electrical shock during operation.
Cleaning the work area: Use brushes, vacuum cleaners and other tools to remove debris, dust and oil from the work area, keep the work area clean and tidy, and prevent contaminants from entering the installation area and affecting the installation and operation of the friction plate.
Marking and Recording: Mark and record the installation location, orientation of the old friction plate, and the connection method of the associated components. For example, make corresponding marks on the clutch pressure plate and flywheel, and record the relative positions of the friction plate splines and the splined shaft to provide precise reference for installing the new friction plates.
2. Remove the old friction plate.
1. Separation of related components
Clutch friction disc: First, locate the clutch operating mechanism, such as a cable-type clutch, use a wrench to loosen the cable adjusting nut to separate the cable from the clutch; for a hydraulic clutch, first drain the clutch hydraulic oil, then remove the oil pipe joint to separate the hydraulic system from the clutch.
Brake lining: For drum brakes, use a socket wrench to loosen the brake drum mounting bolts and remove the brake drum from the wheel hub; for disc brakes, first loosen the brake caliper mounting bolts and remove the brake caliper from the brake disc.
(ii) Removing the pressure plate or brake caliper
Clutch Pressure Plate: Using a socket wrench, gradually loosen the pressure plate mounting bolts in a diagonal pattern. Since the pressure plate spring has a high compression force, exercise caution during disassembly to prevent the pressure plate from suddenly popping out and causing injury. When removing the last few bolts, do so slowly and support the pressure plate with your hand to ensure smooth removal.
Brake Caliper: After removing the brake caliper mounting bolts, carefully remove the caliper from the mounting bracket. If there is binding between the brake caliper and the brake disc, you can lightly tap the caliper with a rubber mallet to loosen it, but be careful not to damage the caliper or brake disc.
(III) Removing the old friction plate
Clutch Friction Disc: Remove the old friction disc from the splined shaft and inspect the splined bore and splined shaft for wear. If there is a retaining ring between the old friction plate and the splined shaft, remove it with pliers and then remove the friction plate.
Brake pads: For drum brakes, remove the old pads from the grooves on the brake hub; for disc brakes, remove the old pads directly from the caliper clamps. When removing the old friction lining, be careful not to damage the brake hub or brake disc.
3. Install the new friction plate.
1. Cleaning the installation site
Cleaning the spline shaft: Use a cleaning solution and a clean cloth to thoroughly clean the spline shaft surface of oil, dirt, and rust. To remove oil stains, use a brush with detergent, then wipe dry with a clean cloth. After cleaning, apply a suitable amount of grease to the spline shaft to reduce wear during installation and use of the friction plate.
Cleaning the brake hub or brake disc: For the brake disc, use sandpaper to gently polish away any rust and rough spots, leaving a smooth, even surface. Then, clean it with a cleaner to remove any debris and oil stains left by sanding. When polishing the brake disc, also use sandpaper and a cleaning solution to ensure there are no oils or contaminants on the disc surface and to avoid reducing braking performance.
Cleaning the Pressure Plate or Brake Caliper: Clean the mounting surface of the pressure plate or brake caliper to remove oil, dirt, and residual friction material. Check that the pressure plate spring is elastic. If the spring is broken or worn, it should be replaced promptly. For brake calipers, check that the piston moves freely. If it is stuck, it must be repaired or replaced.
(II) Installing the friction plate
Clutch friction disc: Install the new friction disc onto the splined shaft, ensuring the spline holes align properly with the splined shaft and that the clearance is uniform. Pay attention to the installation direction. There are usually markings on the friction plate indicating the installation direction, such as arrows or letters. Install it correctly according to the markings to avoid reverse installation, which could result in improper clutch operation.
Brake lining: For drum brakes, carefully install the new lining into the brake hub groove, ensuring the lining fits snugly against the brake hub without any play. For disc brakes, install the new brake pads into the caliper jaws so that the gap between the pads and the disc is uniform.
(III) Installing the pressure plate or brake caliper
Clutch pressure plate: Place the pressure plate back to its original position and gradually tighten the mounting bolts with a torque wrench in a diagonal pattern. During the tightening process, follow the torque value specified in the equipment manual to ensure that the friction plate pressure plate is evenly compressed. For example, the tightening torque of the clutch pressure plate bolt of a certain bulldozer model is 100-120 Nm. The tightening torque must be strictly controlled to avoid clutch failure due to excessive or insufficient torque.
Brake Caliper: Install the brake caliper onto the brake disc and tighten the mounting bolts. Tighten the bolts to the specified torque value to ensure a secure fit. After installation, check that the clearance between the brake caliper and the brake disc is uniform and adjust if necessary.
(IV) Installation of other components
Clutch Actuator Installation: Install the clutch actuator in the reverse order of disassembly. For example, for a cable-actuated clutch, connect the cable to the clutch and adjust the cable length to ensure proper free play and clutch pedal travel. For a hydraulic clutch, connect the oil line connection, add the required amount of hydraulic oil, and bleed the system.
Installing the brake drum or brake disc: If the brake drum or brake disc was previously removed, reinstall it and tighten the mounting bolts. After installation, check that the brake drum or brake disc rotates freely and does not bind.
4. Testing and debugging after installation
1. External inspection
Checking the installation position of the friction plate: Check whether the friction plate is installed in the correct position, whether it fits tightly on the spline shaft, brake hub or brake disc, and whether there is any play or misalignment.
Checking the installation of the pressure plate or brake caliper: Check that the pressure plate or brake caliper is securely installed, that the mounting bolts are tight, and that there are no missing or loose parts. Check for uniform compression of the pressure plate spring and the correct position of the brake caliper piston.
Check connections of other components: Check that other components, such as the clutch mechanism and brake lines, are connected correctly and securely, and are not loose, warped, or leaking.
(II) Gap adjustment
Adjusting the clutch clearance: Check the clutch pedal free play, which is typically 30–50 mm and can be achieved by adjusting the cable length or the hydraulic system adjusting bolt. After adjusting, press the clutch pedal and check for smooth engagement and disengagement, and for any sticking or slipping.
Brake Clearance Adjustment: For drum brakes, use a brake clearance adjuster to adjust the clearance between the brake shoe and the brake drum; it's typically 0.2–0.5 mm. When adjusting, rotate the brake drum until it rotates smoothly, without any noticeable resistance. For disc brakes, check the clearance between the brake shoe and the brake disc; it's typically 0.1–0.3 mm. If necessary, adjust the clearance by adjusting the brake caliper piston.
(III) Performance testing
Starting test: Connect the negative terminal of the battery, start the bulldozer engine and check if the engine starts normally and if there is any unusual noise or vibration.
Test drive: Drive the bulldozer at low speed for a short distance to ensure the clutch engages smoothly and there is no slippage or shaking. While driving, pay attention to the smoothness of the vehicle's acceleration and gear shifting.
Brake Test: Conduct a low-speed brake test to check for braking effectiveness, sensitivity, and reliability, as well as any deflection or resistance. The braking distance must comply with the equipment's operating manual. For example, the braking distance for a specific bulldozer model at a specified speed should not exceed 3 m.


Exhibition cabinets

Getting to know the plant
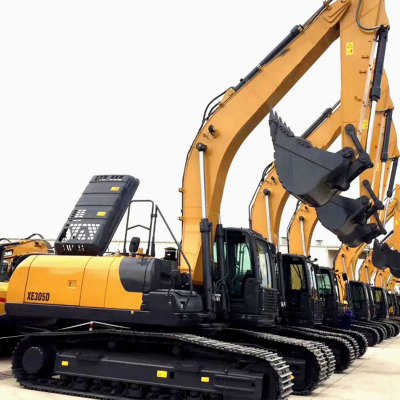
The plant employs a team of highly qualified and experienced engineers who continuously innovate and improve its products. The company currently holds a number of independent intellectual property rights and patented technologies. Its construction equipment includes a wide range of excavators, loaders, cranes, bulldozers, and other machines. These products are distinguished by their high productivity, reliability, energy efficiency, and environmental friendliness, as well as the ability to adapt to challenging operating conditions in a variety of climates and environments worldwide.

Awards and qualificationsfication

frequently asked questions
1. Which countries do we export to?
Asia: Vietnam, India, Indonesia, Pakistan, Kazakhstan, Uzbekistan, etc.
Europe: Russia, Belarus, Ukraine, Lithuania, Saudi Arabia, etc.
South America: Brazil, Chile, Paraguay, Argentina, etc.
Africa: South Africa, Ethiopia, Libya, etc.
2.What payment terms can we accept?
Usually we can work on T/T, 30% TT before production and 70% TT before shipment
3.What logistics methods can we use for delivery?
1) For most of Europe, South America and Africa etc. countries, we can go by container or Roro via ocean freight.
2) For China's neighboring countries, such as Russia, Vietnam, Kazakhstan, Uzbekistan, etc., we can deliver by road or rail.
3) For light spare parts in urgent requirement, we can ship it by international courier service, such as DHL, TNT, EMS or other air freight.
4. How can you guarantee that you have delivered the goods to customers?
A: We will provide you with full delivery information for you confirmed.
5.What are our advantages compared with other manufacturers/factories?
1) Reliable quality: Carefully select reliable manufacturers to support spare parts such as engines, axles, transmissions, and many parts designed and produced by ourselves, always adopting the best materials.
2) Competitive price: Concentration of mechanized production in large quantities reduces production costs to ensure competitive price.
3) Service Team: Our sales managers are available 24/7, ready to answer your questions at any time. Our professional technical support team, with senior technicians, is ready to provide support to users and dealers. Most issues can be resolved within 24 hours.
4) Fast delivery: Generally, we can delivery within 10 working days in factory after receiving the advance payment from customers.
6. How can you provide after-sales service to customers?
A: We will reply you at the first time and help you solve the problems within 24 hours. If we really need your local, we
We will send your professional person to your locality to help you solve the problems without any hesitation, supply you with all-round