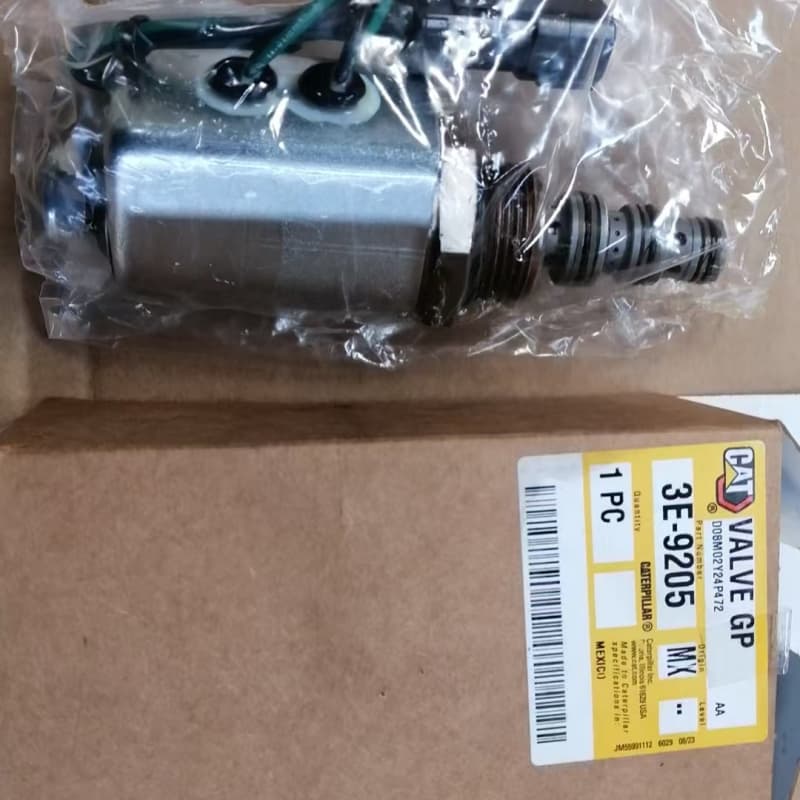
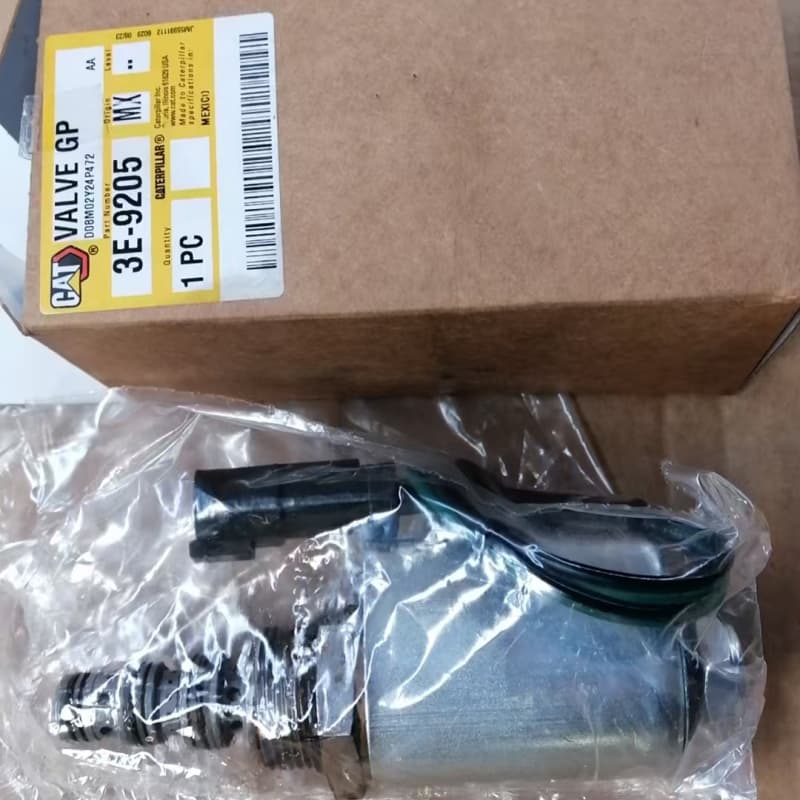
Caterpillar 3E-9205 Solenoid Valve Assembly D7R D6R
1. Fast response: Advanced electromagnetic design, can quickly open or close when power is turned on, precise control and fast response of the system.
2. Durability: High-quality materials are selected, and the valve core and seat are specially treated to ensure wear resistance and corrosion resistance, and can work stably under harsh conditions.
3. High adaptability: Customized design for various Carter equipment, precise interface characteristics, easy installation and seamless connection with the hydraulic and pneumatic systems of the equipment.
Product Introduction
Basic information
Brand: Caterpillar.
Some models: 186-1525, 398-0940, 3E-6424, 7G8765.
Product type
By purpose: electromagnetic valves for controlling fuel injection, electromagnetic valves for controlling air intake and exhaust, electromagnetic valves for the carbon canister system, etc.
By operating mode: normally closed type of electromagnetic valve, for example 186-1525.
Operating Parameters
Voltage: 12VDC, 24VDC are common.
Connector type: eg 2-pin connector.
Thread size: eg 3/4-16.
Application scenario
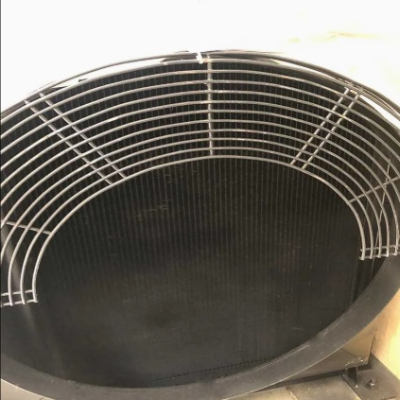
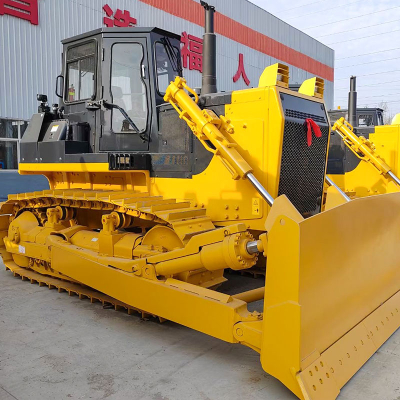
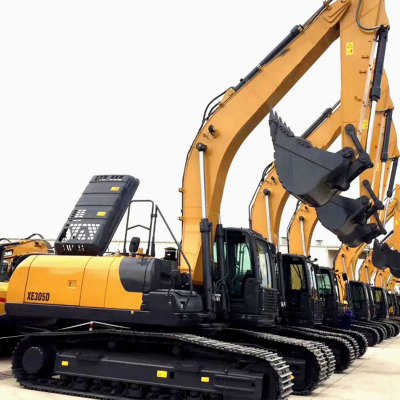
Mechanical engineering: hydraulic system, fuel system, control system for excavators, bulldozers, loaders and other equipment.
Engines: Used to control fuel injection, intake, exhaust and other controls of various Caterpillar engines such as C7, C9, 3306, etc.
Production process
Material: The valve body is often made of steel, alloy steel and other materials to ensure strength and durability.
Processing: Strict production process and high manufacturing precision ensure the stable performance and reliability of the solenoid valve.
Detailed troubleshooting method for crankcase solenoid valve
1. Troubleshooting the coil
1. External inspection
Carefully inspect the solenoid coil for obvious signs of physical damage, such as burning, discoloration, or breakage. If you notice burn marks on the coil's surface, this usually means the coil has been exposed to high temperatures and may have shorted out.
Check the coil insulation for cracks or delamination, which could lead to short circuits or leaks. If the insulation is damaged, additionally check for exposed, broken, or other internal wires.
(ii) Resistance measurement
Using the multimeter's resistance range, touch the test leads to the two terminals of the electromagnetic coil. Under normal conditions, the coil's resistance value should be within the range specified in the product specifications. If the measurement shows a resistance value close to zero, this indicates the coil may be short-circuited; if the resistance value is infinite, this indicates an open circuit.
Compare the resistance values of solenoid valve coils from different batches or from the same model that are operating normally. If the measured current deviates significantly from the normal range, even if it doesn't reach the level of a short circuit or open circuit, this may indicate a problem with the coil, such as partial damage to the winding.
(III) Power-on test
To ensure safety, apply power to the solenoid valve and measure the coil surface temperature with an infrared thermometer. If the coil temperature rises rapidly over a short period of time, even significantly outside the normal operating temperature range, this may indicate a short circuit within the coil, causing excessive current and heat.
Pay attention to whether the coil makes any unusual sounds when powered, such as excessive humming. Abnormal noise may be caused by unbalanced electromagnetic force in the coil or vibration of the iron core, which could also indicate a faulty coil.
2. Valve core troubleshooting
1. Disassembly and inspection
Carefully disassemble the solenoid valve and remove the valve core assembly. Inspect the valve core surface for scratches, wear, deformation, etc. If the valve core surface has obvious scratches or wear, the clearance between the valve core and the valve body may increase, affecting sealing efficiency and valve movement.
Check the tightness of the valve core connection to the spring, and also check that the spring is not broken, deformed, or has lost its elasticity. A broken spring will prevent the valve core from returning to its original position properly, which will affect the proper operation of the solenoid valve.
(II) Action Test
After removing the valve core from the valve body, press on the valve core manually to feel its smooth movement. Under normal conditions, the valve plunger should move freely within the valve body without any noticeable binding or resistance. If you feel strong resistance when pressing the valve core, or even an inability to press it, this may be due to debris entering the valve body and lodged between the core and the valve body, or the surface of the valve core is damaged, causing increased friction.
Check that the valve core stroke in the valve body meets the specifications. The maximum valve core stroke can be measured using a tool such as a caliper and compared to the standard value specified in the product specifications. If the stroke is insufficient or excessive, it may affect the proper operation of the solenoid valve.
(III) Checking the fluid
Check that the fluid passing through the solenoid valve is clean. If the fluid contains impurities, particles, etc., they will likely enter the valve body and cause the valve core to become stuck. A filter can be installed at the fluid inlet and regularly checked for clogging to determine the degree of fluid contamination.
Check that the fluid properties match the solenoid valve's applicable range. For example, if a solenoid valve is suitable for a specific liquid or gas, but the actual fluid used does not meet the requirements, this could lead to corrosion or damage to the valve core and seals.
3. Troubleshooting leaks
1. External inspection
Check the appearance of the seal for signs of aging, deformation, cracks or damage. Aging of seals typically results in surface hardening, loss of elasticity, and darkening of color; deformation may cause the seal to not seat properly in the seal groove; cracking and damage will directly lead to seal failure.
Check that the seal is installed correctly and there are no distortions, deviations, etc. Incorrect installation is one of the common causes of seal failure. Even if the seal itself is of good quality, improper installation will affect its effectiveness.
(II) Leak detection
When operating the solenoid valve, carefully inspect the solenoid valve connection to the pipeline, the valve body mating surface, and any other possible leaks to ensure there are no fluid leaks. You can apply soapy water to these areas. If bubbles appear, this indicates a leak.
Some small leaks are difficult to detect with the naked eye. At this point, you can use pressure testing equipment to perform a pressure test on the system where the solenoid valve is located. Close the appropriate valves to maintain a specific pressure in the system and observe whether the pressure drops. If the pressure drops significantly, this indicates a leak in the system and requires further investigation.
(III) Checking the seal material
Ensure that the seal material meets the solenoid valve's operating requirements. Different liquids and operating environments have different requirements for sealing materials. For example, high-temperature applications require high-temperature-resistant sealing materials, while corrosive liquids require corrosion-resistant sealing materials. Selecting the wrong seal material can easily result in seal failure.
Check the seals to see if they have reached the end of their service life. Seals are wear parts and have a limited lifespan. If a seal is used for too long, even if it doesn't show any visible damage, it may lose its sealing properties due to aging and will eventually need to be replaced.
4. Troubleshooting the electrical connection
1. Checking the plug/socket
Check the metal tabs of the plug and socket for deformed, oxidized, corroded, etc. A deformed tab may not fit tightly onto the plug or socket, resulting in poor contact; oxidation and corrosion will increase contact resistance and affect current flow. You can use sandpaper to gently polish oxidized or corroded areas and restore proper conductivity.
Check that the wires are securely attached to the plug and that they are not loose or disconnected. Loose wire connections will increase contact resistance and prevent the solenoid valve from functioning properly. Use a screwdriver or pliers to tighten or secure loose wires.
(II) Checking the electrical wiring
Check the solenoid valve wiring diagram for proper wiring. Check that the power and control lines are connected correctly, and that there are no incorrect connections or reverse polarity. Incorrect connections can cause solenoid valve failure or even damage to the solenoid valve or associated control equipment.
Check the circuit for damage, shorts, or opens. Use the multimeter's resistance or continuity range to measure the circuit's resistance or continuity. If the line's resistance value is abnormally high or infinite, it may be open; if the resistance value approaches zero, a short circuit is possible.
(III) Checking the control circuit
Check to see if the fuse in the control circuit has blown. If the fuse blows, it indicates a problem in the control circuit, such as an overload or short circuit. Further investigation is needed to determine the cause of the problem and replace the fuse before retesting.
Check the proper operation of relays, contactors, and other components in the control circuit. You can determine whether a component is faulty by observing its operation and measuring its operating voltage and current. If a component in the control circuit fails, this may also cause the solenoid valve to malfunction.


Exhibition cabinets

Getting to know the plant
The plant employs a team of highly qualified and experienced engineers who continuously innovate and improve its products. The company currently holds a number of independent intellectual property rights and patented technologies. Its construction equipment includes a wide range of excavators, loaders, cranes, bulldozers, and other machines. These products are distinguished by their high productivity, reliability, energy efficiency, and environmental friendliness, as well as the ability to adapt to challenging operating conditions in a variety of climates and environments worldwide.

Awards and qualificationsfication

frequently asked questions
1. Which countries do we export to?
Asia: Vietnam, India, Indonesia, Pakistan, Kazakhstan, Uzbekistan, etc.
Europe: Russia, Belarus, Ukraine, Lithuania, Saudi Arabia, etc.
South America: Brazil, Chile, Paraguay, Argentina, etc.
Africa: South Africa, Ethiopia, Libya, etc.
2.What payment terms can we accept?
Usually we can work on T/T, 30% TT before production and 70% TT before shipment
3.What logistics methods can we use for delivery?
1) For most of Europe, South America and Africa etc. countries, we can go by container or Roro via ocean freight.
2) For China's neighboring countries, such as Russia, Vietnam, Kazakhstan, Uzbekistan, etc., we can deliver by road or rail.
3) For light spare parts in urgent requirement, we can ship it by international courier service, such as DHL, TNT, EMS or other air freight.
4. How can you guarantee that you have delivered the goods to customers?
A: We will provide you with full delivery information for you confirmed.
5.What are our advantages compared with other manufacturers/factories?
1) Reliable quality: Carefully select reliable manufacturers to support spare parts such as engines, axles, transmissions, and many parts designed and produced by ourselves, always adopting the best materials.
2) Competitive price: Concentration of mechanized production in large quantities reduces production costs to ensure competitive price.
3) Service Team: Our sales managers are available 24/7, ready to answer your questions at any time. Our professional technical support team, with senior technicians, is ready to provide support to users and dealers. Most issues can be resolved within 24 hours.
4) Fast delivery: Generally, we can delivery within 10 working days in factory after receiving the advance payment from customers.
6. How can you provide after-sales service to customers?
A: We will reply you at the first time and help you solve the problems within 24 hours. If we really need your local, we
We will send your professional person to your locality to help you solve the problems without any hesitation, supply you with all-round